
Holy cow, only nine days until we get hitched! I am up to my eyeballs in DIY projects, but the reward of doing all the paper items on my own will be priceless. I already received so many kind words from guests for our handmade invitaitons. But since the hubby-to-be has already departed for Europe, I'm left for a week to finish trimming placecards, rounding corners on the programs and make out-of-town packets. Well, the week has melted into a mere few days to get it all done. I have been pleasantly surprised at my own efficiency. Once I arrive home from the wedding, I'm going to really pursue my dream of having my own shop. After handmaking all my wedding projects, I'm confident that I can handle a business and make beautiful invitaitons for other future brides! Stay tuned for results from my labors and wedding pics!
We are getting married in my hubby-to-be's hometown in Wales, UK. Our venue is at the breathtaking Caerphilly Castle. Yes, I wrote CASTLE. I mean, who would have thought I'd be getting married in a castle?! I am a lucky gal. Not just for the castle part, but my man is wonderful too :)
The venue has been booked for over a year but I can still hardly believe it. There is a moat and everything!
 This is the Great Hall where the ceremony and reception will be held.
Friday
9 Days
Wednesday
Thank you, thank you
My wedding day is quickly approaching and I'm getting nervous. No, not about BEING married, but GETTING married is the tricky part. Of course I'm scurrying around to get all my paper wedding items ready to go. Oh, not to mention all the non-paper stuff (like the dress, must not forget to pack that!)
What do I do when I'm nervous? Craft of course! So it works out perfectly that I should try to relax while getting wedding stuff done at the same time.
And of course, I turned to my new Gocco machine for comfort.
What do I do when I'm nervous? Craft of course! So it works out perfectly that I should try to relax while getting wedding stuff done at the same time.
And of course, I turned to my new Gocco machine for comfort.
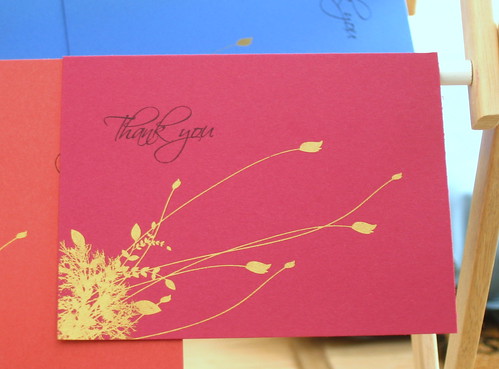
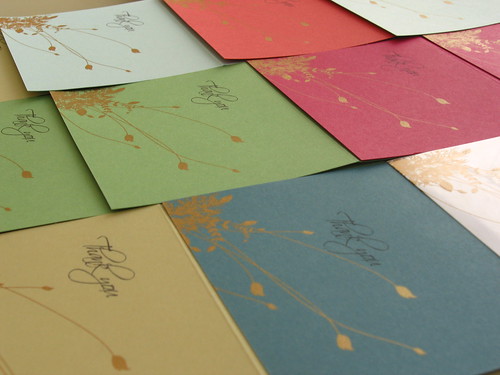
I printed these thank you notes using my Gocco machine in gold ink and printed off the "Thank You" on my printer. I was able to use the same design for 30 5 x7 cards and 30 A2 cards. It was a great way to test out what the gold ink looked like on different colors of cardstock.
Since we are getting married in Wales, I decided to do thank you notes now so we can give it to famliy before we leave. They have done a lot in helping us plan. We'll send some in the mail as well after the wedding to thank them for gifts.
Soon enough I will post new items in my Etsy shop. I think I'll do an 8-set of these.
Curious?? Read on right here...Share your creativity with us!
1 VIEWER CLICKED HERE TO SHARE. ADD YOUR THOUGHTS.
Yummy Treats
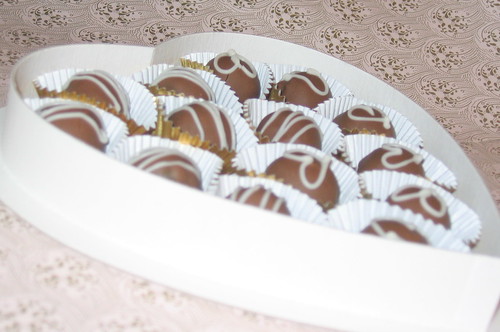
Do you snack when you craft? I do. It gets my creative juices going and a great excuse to treat myself to some chocolate!
My Mom brought me a few boxes of these home made beauties. Aren't they pretty to look at? They taste better and inspired many a LizzyJDesigns creations this week:
My Mom brought me a few boxes of these home made beauties. Aren't they pretty to look at? They taste better and inspired many a LizzyJDesigns creations this week:
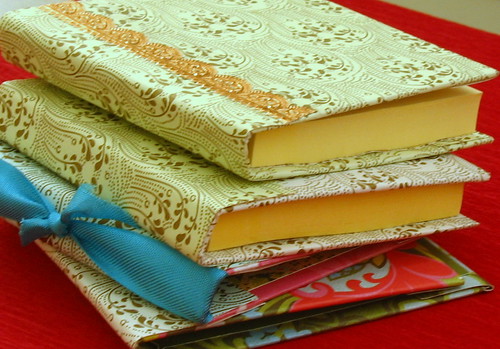
Post-It Notes covers
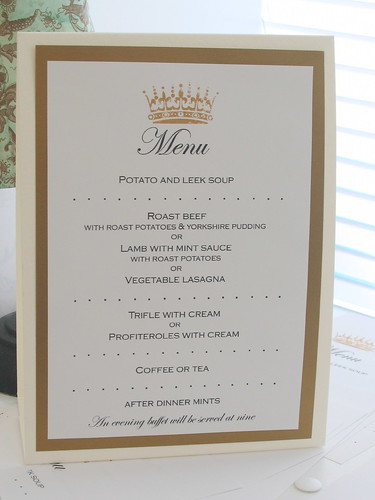
Finally mounting my menus to tent cards!
(Ok, that's not that fun but lots of snacking was involved in the process)
Thank You card

Wooden Frame--My first paper decoupage project!

And a graduation card

Curious?? Read on right here...
Tuesday
Aren't these FAB?!
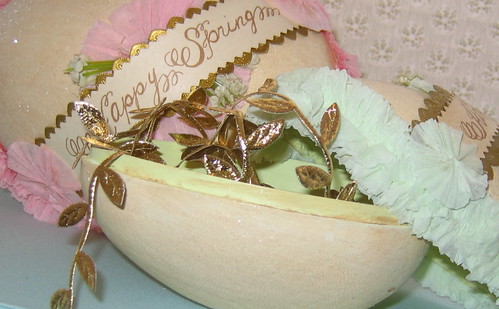
I just HAD to share my newest ribbon/trim/whatever container. I grabbed up these two delicious Nicol Sayre nested eggs at One Hundred Wishes. Easter is long over but I still love them.
The larger egg says "Happy Spring" and the smaller says "Happy Easter." They still brighten my day, no matter which season it is!

I put leaf trims and seam binding in these eggs, but some other little things on my craft table have found their way into them. They are so pretty and useful!
 Right now I have them perched on top of my paper box. I will find a more prominent place to display them later---maybe next spring!
Andrea at One Hundred Wishes has great stuff. I must wait until the wedding to put in another order. In the mean time, I can dream up all the things I will create with pretty ribbons and trims!
Share your creativity with us!
Be the first to leave a comment!
Monday
Gettin' My Gocco On

After a wild goosechase with Fed-Ex, I finally received my Gocco machine from Paper Source! Over the weekend I got busy designing, trimming and printing my reception table cards on my Gocco. Here's what happened.
One thing before we begin. Since Gocco supplies do not come cheap, be prepared for some waste. Although everything was carefully planned out, the best part about crafting for me is being spontaneous and creating something I've never thought of before. With that, came some wasted bulbs and screens, but you just have to move past it. The more prints I did, the more I learned. I put together a price breakdown at the bottom of this post to you get an idea. Ok, now for the fun stuff!
Ta-da! Here's the unassuming Japanese contraption that brought so much joy to my weekend!


I got the small Gocco PG5 machine that prints up to 3.75" by 5.75" images. Of course you can print on larger paper, just the image has to be that size.
The first thing you need to do is create an original image. The key is to use carbon, so photocopies from laser printers work very well. Inkjet printouts do not. Two bulbs wasted. But I'm over it.
You can also use the carbon pen that to Gocco machine comes with to draw the text or image you want to print. I am using a design for my table numbers and menus. I placed the photocopy on the sticky foam surface (your paper will unstick). I was careful line up the corners so I know exacty where to put the sheets for my final prints. This way, I won't have as many mistakes on my final paper.
Since I used a photocopy, I had to put a blue filter (included with machine) behind the master screen. If you use the pen, you do not need the blue filter. Slide these two into the top part of the machine. Sorry I didn't get a good pic of the filter before I flashed the bulbs, just pretend that master screen is blank!
Blue Filter with master screen

Slide both into top of machine with the blue filter away from you and the arrow on the master screen facing you and down.
Now screw in two bulbs in the yellow part of the machine. They are coated with chemical, so be careful and wash your hands after! Line up the arrows and place the yellow part with the bulbs on top of the closed orange machine. It should snap into place. When they are connected, it should look like the picture below when the machine is open.

Next, press down on the bottom corners of the machine with your photocopy in place. It was much easier for me to stand up to do this. It's not hard, I'm just a weakling. Don't look at the machine, the flash this produces is very bright. I've heard people say that there's smoke or that it's very hot, but I did not experience this. Well, the bulb was a bit hot, so don't touch it, but it was not smoking. It was quick and clean. This was the easy part!
Open the machine and you have made your master screen! Remove the screen and blue filter. You can set aside your blue filter. You won't need anymore until your next photocopy print.
Peel back to clear plastic and you are ready to begin inking your master screen.
 Now, this is the part I am quite proud of. The design I have is a crown with some flourishes around it. I wanted to make menu cards with just the crown and table numbers with the crown and flourishes, but use only one screen. So I exposed everything but will only begin with the crown to make my menus.
I used ink blocking (also included with machine), little strips of foam that is sticky on one side. I only want to print to crown so to make sure the ink doesn't bleed into the flourish part of the design and print it, I blocked off the design.
Ink blocking strips

 Now I'm ready to ink my screen. The Gocco machine includes three tubes of paper inks in black, red and gold. Several more colors are available. There is also ink specifically for printing on fabric.


 When you lift the machine up, the paper will stick to the top, unless you have it directly on the sticky pad. In my case, I didn't but I just peeled off the paper and it was fabulous! As you can see, only the crown design printed because I did not ink the rest of the image.
A little ink goes a long way. I printed about 35 menus without re-ink and could have done more. A bunch more.

Now remember I was going to print the rest on my design using the same screen? After I printed off only the crown to my heart's content, I used the ink blocking method so I can print multiple colors.
 After I separated each section (different section, different color), I inked away! I was very generous with the ink because if you lift that clear plastic to re-ink, some of the colors might swoosh together making imperfect prints. Might be a cool effect, but not for my purposes today anyway.
 I repeated the steps above and inked my second set of prints. This time, I lined up the corners of my paper to the corner of the sticky foam to ensure proper placement of the print.


 Here are some other things I tried with Gocco this weekend:
Text works very well with Gocco. I was afraid the text was too small but it came out very crisp, much better than printing on my inkjet.

I love how the gold comes up on black.

It was a busy weekend for me and my Gocco!

All in all, I am very pleased with the Gocco. Of course you can achieve the desired effect with this using computer printers or stamps, but it wasn't the same. And while wedding guests enjoy their meal without notice my table numbers, I will think back on this weekend fondly.
Price breakdown
Each print will take:
2 bulbs= about $3.00
1 master screen= about $3.00
So right there, you are looking at least $6 to make a print, not including ink. But this might not be a bad investment if you are looking to make hundreds of copies. the tubes of ink will last you-- they are quite large. It is not good if you want to make a set of 8 note cards or something. So it's good to plan ahead. As I did this weekend, I was able to do two projects with on screen and two set of bulbs. Make use of the space on the screen. I also heard I can wrap up used screens, ink and all, in saran wrap and keep it in the fridge to use later. We'll see how that turns out.
Curious?? Read on right here...Share your creativity with us!
Be the first to leave a comment!
Wednesday
Locco for Gocco!
Since I started wedding planning, I've been learning about the Gocco machine and it was love at first virtual sight. Gocco is a home printing system that works like silk screening. There are lots of tutotials online and you can see beautiful designs people have done on Flickr and Etsy.
At first, I had to have one. Then I thought, "You'll never use it. Spend the $$ on fancy place cards for the wedding instead, stupid." Months went by when the Gocco and I didn't speak. Then our love affair reignited when I got around to designing all my wedding stationery. I broke down.....and bought one!
I justified it as an investment/reward for doing my own stationery for the wedding. The $$ I've saved!! Besides, this is the only time I'll need to make 100 copies of something (pronto), and the Gocco is perfect for multiple productions. Also, I wanted have gold/metallic/pearl on my table cards, but am finding that the metallic papers really do add up! This way, I can use paper I already own in my craft arsenal and still have some glam with pretty METALLIC INK the Gocco comes with! That's a good reason right?
I'm sitting by the window waiting for the mailman to bring me my precious Gocco. Stay tuned for some experimental prints!
Curious?? Read on right here...
Share your creativity with us!
Be the first to leave a comment!
Subscribe to:
Posts (Atom)